2. Setting up reproducible environment#
By the end of this lecture, you should be able to:
Understand the benefits of using environment management tool such
condaSet up a simple reproducible environment using
condaandenv.yamlfilesSet up a sample project structure using the
cookiecutterdata science template
1. Importance of Managing Environment#
Managing environments is crucial in data science for several reasons:
Dependency Management: Different projects may require different versions of libraries. Without managing environments, you might face conflicts between these dependencies.
Reproducibility: Ensuring that your code runs the same way on different machines or at different times is essential for reproducibility. An unmanaged environment can lead to inconsistencies.
Isolation: Isolating project environments prevents changes in one project from affecting another.
Examples of Issues Without Environment Management#
Version Conflicts: Installing a new version of a library for one project might break another project that relies on an older version.
Inconsistent Results: Running the same code on different machines might yield different results due to different library versions.
Difficult Collaboration: Sharing code without a managed environment can lead to “it works on my machine” problems.
2. Introduction to Conda#
Conda is an open-source package management and environment management system. It is useful because:
It allows you to create isolated environments with specific versions of libraries and dependencies.
It supports multiple programming languages, including Python and R.
It simplifies the process of installing and managing packages.
3. Creating a Conda Environment from Scratch#
To create a new conda environment and install packages, follow these steps:
# Create a new environment named 'myenv' with Python
conda create --name myenv python

# Activate the environment
conda activate myenv

# Install packages, e.g., numpy and pandas
conda install numpy pandas
4. Creating a Conda Environment from a YAML File#
You can create a conda environment from a YAML file, which specifies the environment configuration:
# environment.yml
name: myenv
dependencies:
  - python
  - numpy
  - pandas
To create the environment from the YAML file:
conda env create -f environment.yml
5. Managing Conda Environments#
Updating a Conda Environment#
You may need to update your environment for a variety of reasons. For example, it may be the case that:
one of your core dependencies just released a new version (dependency version number update).
you need an additional package for data analysis (add a new dependency).
you have found a better package and no longer need the older package (add new dependency and remove old dependency).
If any of these occur, all you need to do is update the contents of your environment.yml file accordingly and then run the following command:
conda env update --file environment.yml --prune
Deleting an Installed Package#
To remove a specific package from the environment:
# Remove the 'numpy' package from the environment
conda remove --name myenv numpy
Exporting the Environment to a YAML File#
To export the current environment configuration to a YAML file:
If you want to make your environment file work across platforms, you can use the conda env export --from-history flag. This will only include packages that you’ve explicitly asked for, as opposed to including every package in your environment.
conda env export --from-history -f environment.yml
Deleting a Conda Environment#
To delete an entire conda environment:
# Remove the 'myenv' environment
conda env remove --name myenv
By managing your environments with conda, you can ensure that your data science projects are reproducible, isolated, and free from dependency conflicts.
Slide#
No slide this week. We will use demo instead.
I recommend you to check out the readings below for more details and explanation
Supplemental materials#
Readings#
Software Installation#
1. Install Miniconda (Miniforge3)#
We’ll use Miniforge3 (not other installers) from conda-forge.
macOS
Download the correct Miniforge3 installer for your chip (ARM or Intel) from the link above. Save it to your Downloads folder.
Open Terminal and run:
bash ${HOME}/Downloads/Miniforge3.sh -b -p "${HOME}/miniforge3"
Initialize Conda:
source "${HOME}/miniforge3/etc/profile.d/conda.sh"
conda activate
conda init
Restart your Terminal. You should now see
(base)in your prompt.Verify Conda is installed:
conda --versionExample output:
conda 25.7.0
If you see command not found: conda:
Your terminal shell might be Zsh instead of Bash. Switch to Bash:
chsh -s /bin/bash
Then close all terminal windows and restart.
Windows
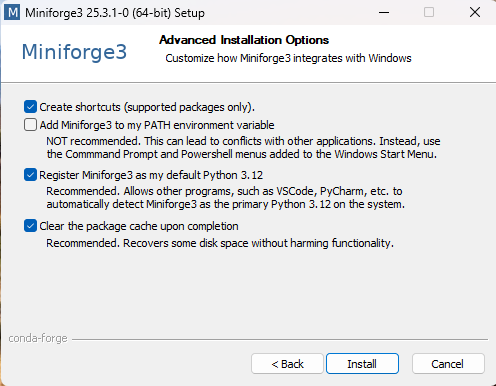
Download the Miniforge3 installer from conda-forge and run it.
Use default options.
Install location should look like:
C:\Users\YOUR_USER_NAME\miniforge3
Do not add Miniforge to PATH.
Do register Miniforge as your default Python.
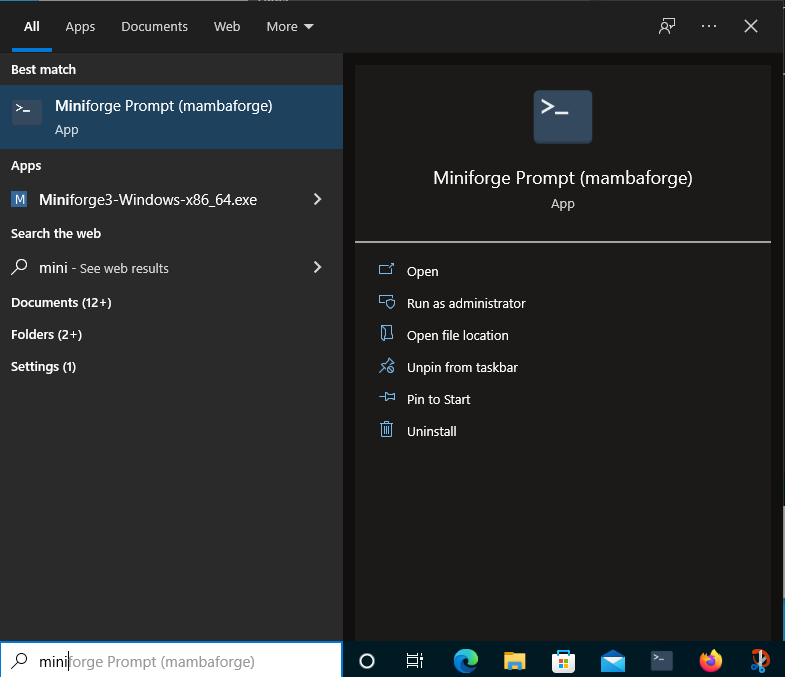
After installation, open the Miniforge Prompt (search in Start Menu). You should see
(base)in the prompt.Check Python version:
python --versionShould return something like:
Python 3.12.9
If not, update Python in base:
conda install python
Integrating Python with Git Bash#
To avoid opening Miniforge Prompt every time, we’ll make Conda available in Git Bash:
Open Miniforge Prompt and run:
conda init bash
This updates configuration files so Conda is visible in Git Bash.
Close all terminal windows and reopen Git Bash. You should now see
(base)in your prompt.
Fixing VS Code Terminal Setup#
Sometimes VS Code uses a different config than Git Bash.
Open Git Bash and edit
.bashrc:code ~/.bashrcAdd the following lines to the file and click save:
if [ -f ~/.bash_profile ]; then . ~/.bash_profile; fi
Setting Git Bash as Default in VS Code#
Open VS Code → Settings (
Ctrl + ,).Search for Default terminal profile.
Set Terminal > Integrated > Default Profile: Windows to
Git Bash.
Now every new VS Code terminal will open with Git Bash and Conda activated.
Exercise#
Install minicoda, following the guide in the lecture note
Create a new conda env called
myenvActivate & Install pymongo
Open your worksheet1, select the kernel
myenv, run the whole notebookExport your conda to
environment.ymlPush this file to your worksheet1’s github repo